• Skip to primary navigation
  • Skip to main content

Ishan Sharma

Full Stack Engineer, Blogger, Student

  • Blog
  • Contact
  • About

Adding A SSL Certificate to Vagrant Machine For Local Development

Programming · January 31, 2017

Adding SSL to VagrantRecently, I was working with an OAuth provider that didn’t accept non https endpoints. For this, I wanted to setup SSL on my local vagrant. I expected the process to be long but it turned out to be quite easy.

If you also need to add SSL to localhost, you can do it in 5 minutes. Here’s a step by step tutorial.

Note: I’m using Ubuntu 14.04 guest on macOS. Instructions for other OS may be different.

Step 1: Generate the SSL Key and Certificate

On macOS, open terminal, go to your project folder (or vagrant root, vagrant needs to have access to these files) and enter following commands:

openssl genrsa -out example.com.key 2048
openssl req -new -x509 -key example.com.key -out example.com.cert -days 3650 -subj /CN=example.com

view raw
generate-cert-and-key.sh
hosted with ❤ by GitHub

Make sure to replace example.com with your local development URL.

Step 2: Install Certificate on Vagrant’s Apache

Do a vagrant ssh to ssh into your vagrant box. Your apache configuration file should be under /etc/apache2/sites-enabled. In my case, it was 000-default.conf.

Here, we need to do two things:

  1. Add SSL certificate and key
  2. Redirect http to https

Add SSL Certificate and Key to Apache

To add SSL certificate and key, edit the file and look for a line that says DocumentRoot and paste following lines below it:

#adding custom SSL cert
SSLEngine on
SSLCertificateFile /vagrant/example.com.cert
SSLCertificateKeyFile /vagrant/example.com.key

view raw
add-ssl.confg
hosted with ❤ by GitHub

Redirect http to https

Next, we need to redirect your local http site to https. Without it, you may get a browser error. Look for a line that says <VirtualHost *:80> and change it to <VirtualHost *:443>. This line tells apache to listen on port 443 for https requests. But, we still need to redirect non https traffic to https. For that, paste following block above the block that starts with <VirtualHost *:443> :

<VirtualHost *:80>
ServerName local.example.com
DocumentRoot /vagrant
Redirect permanent / https://local.example.com/
</VirtualHost>

view raw
vhost-redirect.conf
hosted with ❤ by GitHub

Again, don’t forget to replace local.example.com with your development site address.

Enable SSL Module in Apache

If you restart apache now, you may get a configuration error like this:

Invalid command 'SSLEngine', perhaps misspelled or defined by a module not included in the server configuration

This may happen if mod_ssl_ is not enabled. To enable it, just run this command:

sudo a2enmod ssl

Step 3: Accept Certificate on Host

If you restart apache now, everything should be fine. Visit the site in the browser and you will see this scary warning:

Screenshot of Chrome showing a certificate error


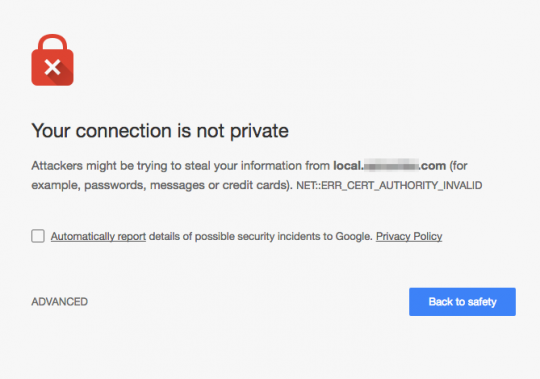
At this stage, you can click Advanced in Chrome and proceed. It will be better to make your OS trust this certificate however. To do that, open Keychain Access and drag cert file into System under Keychains.

Once it is imported, right click the imported certificate and click Get Info. Change first dropdown to Always Trust. Screenshot:
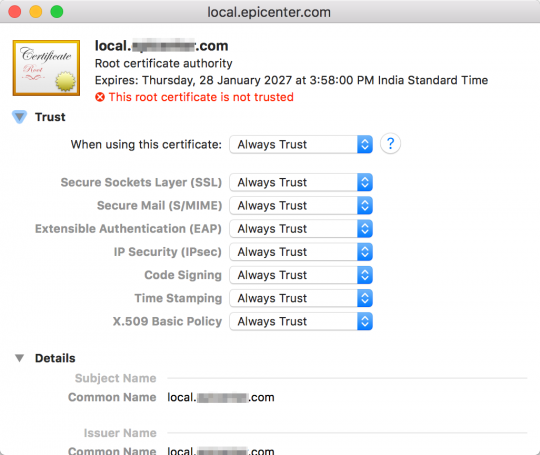
Trusting a certificate in Mac OSX keychain


And we are done

Visit the site in your browser now and it should show up without any errors or warnings, with a secure icon and text in front of it:

And you are done. Did I miss anything?

Let me know and follow me on twitter for more tutorials and interesting tech and gaming related articles.

Share this:

  • Twitter
  • Facebook
  • Reddit
  • More
  • Email
  • Print
  • LinkedIn
  • Pocket
  • Pinterest
  • Tumblr

Filed Under: Programming Tagged With: Vagrant

Ishan

I am a Software Engineer and Writer. Interested in design, AI and drawing. When free, mostly found reading or gaming.

Reader Interactions

Comments

  1. Mark Olson says

    March 17, 2017 at 1:54 AM

    Love the walk through, and I feel like it *almost* worked. But I’m still getting the warning in the browser when I access the page.

    Reply
    • Ishan says

      March 17, 2017 at 10:33 AM

      Hi Mark, thank you for the comment. Did you add the certificate (Step 3?). Without that, browser may not recognise the certificate. Which browser/OS are you using?

      Reply
  2. Sven says

    August 12, 2017 at 3:48 PM

    Hello,

    can you advice me where exactly “/vagrant” is located on Mac?

    I mean to proper direct therein this line?
    SSLCertificateFile /vagrant/example.com.cert

    Reply
    • Ishan says

      August 14, 2017 at 5:38 AM

      Hi Sven,

      There’s no /vagrant on Mac. You need to SSH into your Vagrant box (step 2) and then follow the commands, the folder is mounted on your VM.

      Reply
  3. Matt says

    October 17, 2017 at 1:01 PM

    Thanks, I followed this and it works, but not completely. The redirect caused a loop and wouldn’t load the page, so I disabled it. Https is working, but it’s not detected by Woocommerce which is what I’m using. This might be the problem https://docs.woocommerce.com/document/ssl-by-proxy-problems-network-solutions/
    My setup is different to yours in that it’s a site running within the Vagrant folder (instead of DocumentRoot being /vagrant it’s /vagrant/../..). When I changed 80 to 443 it causes http requests to go to the Vagrant folder. Do I need a section for 80 if I’m using a different folder as the root? Is there another way to implement the redirect so it doesn’t cause a loop?

    Reply
  4. Shahar says

    January 23, 2018 at 12:17 AM

    Thanks Ishan, this worked a treat, thanks!
    Just one thing to note is that restarting apache with the new port will fail unless it’s restarted with sudo, like this:
    `sudo service apache2 restart`

    Reply
  5. Shahar says

    January 23, 2018 at 12:38 AM

    SHA1 is being phased out. To make the certificate SHA256, just add `-sha256` after `-x509` here:

    `openssl req -new -x509 -sha256 -key example.com.key -out example.com.cert -days 3650 -subj /CN=example.com`

    Reply
  6. Stan says

    March 17, 2018 at 5:55 PM

    Also, make sure that you’re domain doesn’t have .dev as first level. You will face issues because of that:

    https://ma.ttias.be/chrome-force-dev-domains-https-via-preloaded-hsts/

    Reply
  7. Red De Guzman says

    May 11, 2018 at 8:47 AM

    How to do this on windows 10?

    Reply
    • Ishan says

      May 16, 2018 at 6:22 PM

      Hi, I don’t have a Windows system around, so won’t be able to help much. I think the only difference would be trusting the certificate, everything else should be same.

      Reply
  8. marti says

    May 15, 2018 at 7:23 PM

    Hi, Chromium and firefox don’t let me validate ssl, chromium shows this error “/domain_name/ sent an invalid response. ERR_SSL_PROTOCOL_ERROR”. And firefox this other error: “An error occurred during a connection to /domain_name/. SSL received a record that exceeded the maximum permissible length. Error code: SSL_ERROR_RX_RECORD_TOO_LONG” I think I did all steps from this article what could be wrong? I am using a vagrant with ubuntu 14.04 and apache.

    Firsts, to create certificates ssl
    openssl genrsa -out /domain_name/.key 2048
    openssl req -new -x509 -key /domain_name/.co.key -out /domain_name/.cert -days 3650 -subj /CN=/domain_name/

    Then, to add custom SSL cert
    SSLEngine on
    SSLCertificateFile /home/vagrant//domain_name/.cert
    SSLCertificateKeyFile /home/vagrant//domain_name/.key

    Finaly I called these commands
    sudo a2enmod ssl
    sudo /etc/init.d/apache2 restart

    Thanks!

    Reply
    • marti says

      May 15, 2018 at 7:50 PM

      Hi guys, I forgot to switch port to 443, now works greatly

      Reply
  9. Dmitry says

    August 14, 2018 at 9:02 PM

    Hi! Thank you for the article, it’s really helpful.
    Not sure if you know already, but I thought I’d note that when you were obfuscating your domain name in the screenshots, you missed a spot in the header of the Keychain Access window here
    https://kf2np18cdh1ksfyh-zippykid.netdna-ssl.com/wp-content/uploads/2017/01/Keychain_Adding_Certificate-540×455.png

    Reply
  10. Themis Theotokatos says

    December 12, 2018 at 6:22 PM

    great tutorial almost worked but I am getting an error after sudo service apache2 restart

    SSLCertificateFile: file ‘/home/vagrant/fcmsoft.local.com.cert’ does not exist or is empty
    Action ‘configtest’ failed.
    The Apache error log may have more information.

    Reply
    • Themis Theotokatos says

      December 12, 2018 at 8:42 PM

      I misunderstood the vagrant directory. I changes the path to the path of my working folder and it worked, however ssh works but its still not trusted.

      Reply
  11. Glenn Cogar says

    December 27, 2018 at 9:42 AM

    Hi Ishan, thanks for your blog, it helped me.

    One question, do you have the instructions for ngix (instead of Apache) or are they the same?

    Reply

Leave a Reply to Shahar Cancel reply

Your email address will not be published. Required fields are marked *

This site uses Akismet to reduce spam. Learn how your comment data is processed.

Copyright © 2021

loading Cancel
Post was not sent - check your email addresses!
Email check failed, please try again
Sorry, your blog cannot share posts by email.